
- Free guide
- Ages 10+
The Complete Guide to Chisel Types and Their Uses

Guided by Squarey · written by Shaun
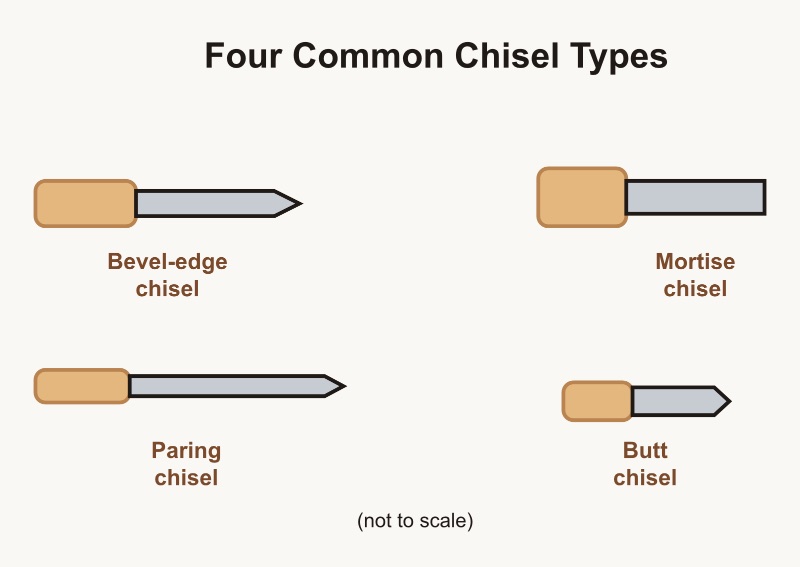
A chisel is one of the oldest tools in the shop, and still one of the most useful. With a sharp edge and a little practice, your builder can carve a hinge mortise, clean up a joint, or shave a stubborn sliver of wood right off a board. This guide is a reference for teaching or learning the main chisel types, what each one is built for, and how to use one safely and well.
Whether you're running a seminar, teaching a scout badge, or just want to know your paring chisel from your mortise chisel, this guide will get everyone speaking the same shop language.
Safety First
A chisel's whole job is to cut wood cleanly — which means it will cut skin just as easily. Before any hands touch a chisel:
- Safety glasses on, every time.
- Always cut away from your body and away from your other hand.
- Keep fingers behind the cutting edge, never in front of it.
- Work on a stable bench or clamp the workpiece down — never hold a piece in your lap while chiseling.
- A sharp chisel is safer than a dull one. Dull edges slip; sharp edges cut where you aim them.
- For builders younger than about 10, an adult demonstrates and supervises every cut closely, and often makes the first cuts together, hand over hand.
Anatomy of a Chisel
Every chisel, no matter the type, shares the same basic parts. Learning these names makes the rest of this guide — and any shop conversation — much easier.
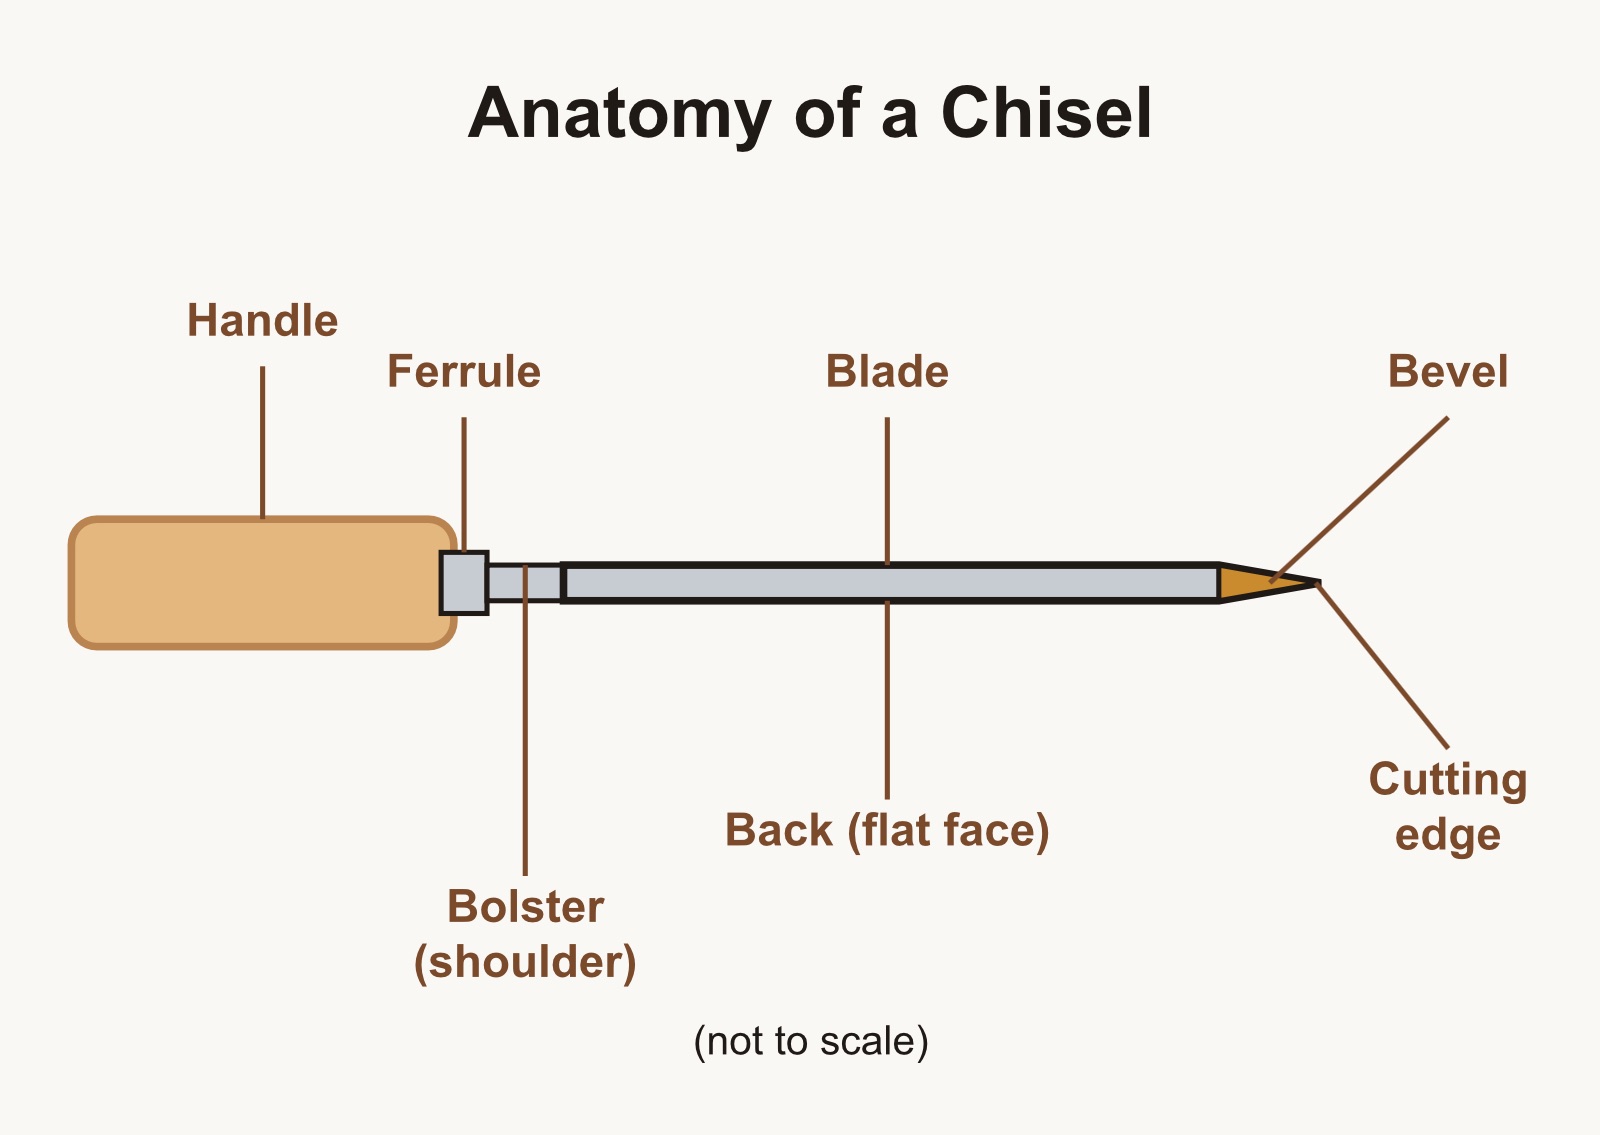
The basic parts of a chisel, the same on every type.
- Handle: what the hand grips, often wood or plastic.
- Ferrule: a metal ring around the handle that keeps it from splitting when struck.
- Bolster (shoulder): the thick collar where handle meets blade; it absorbs mallet blows.
- Blade: the metal body of the tool, running from bolster to cutting edge.
- Bevel: the angled grind on the front face of the blade that forms the cutting edge.
- Back: the flat face opposite the bevel — this stays dead flat and is never ground at an angle.
- Cutting edge: where bevel meets back; this is the part that does the work.
The Main Types of Chisels
Most chisels are shaped for a specific kind of cut. Knowing the family helps a builder (or a seminar room) pick the right tool fast.
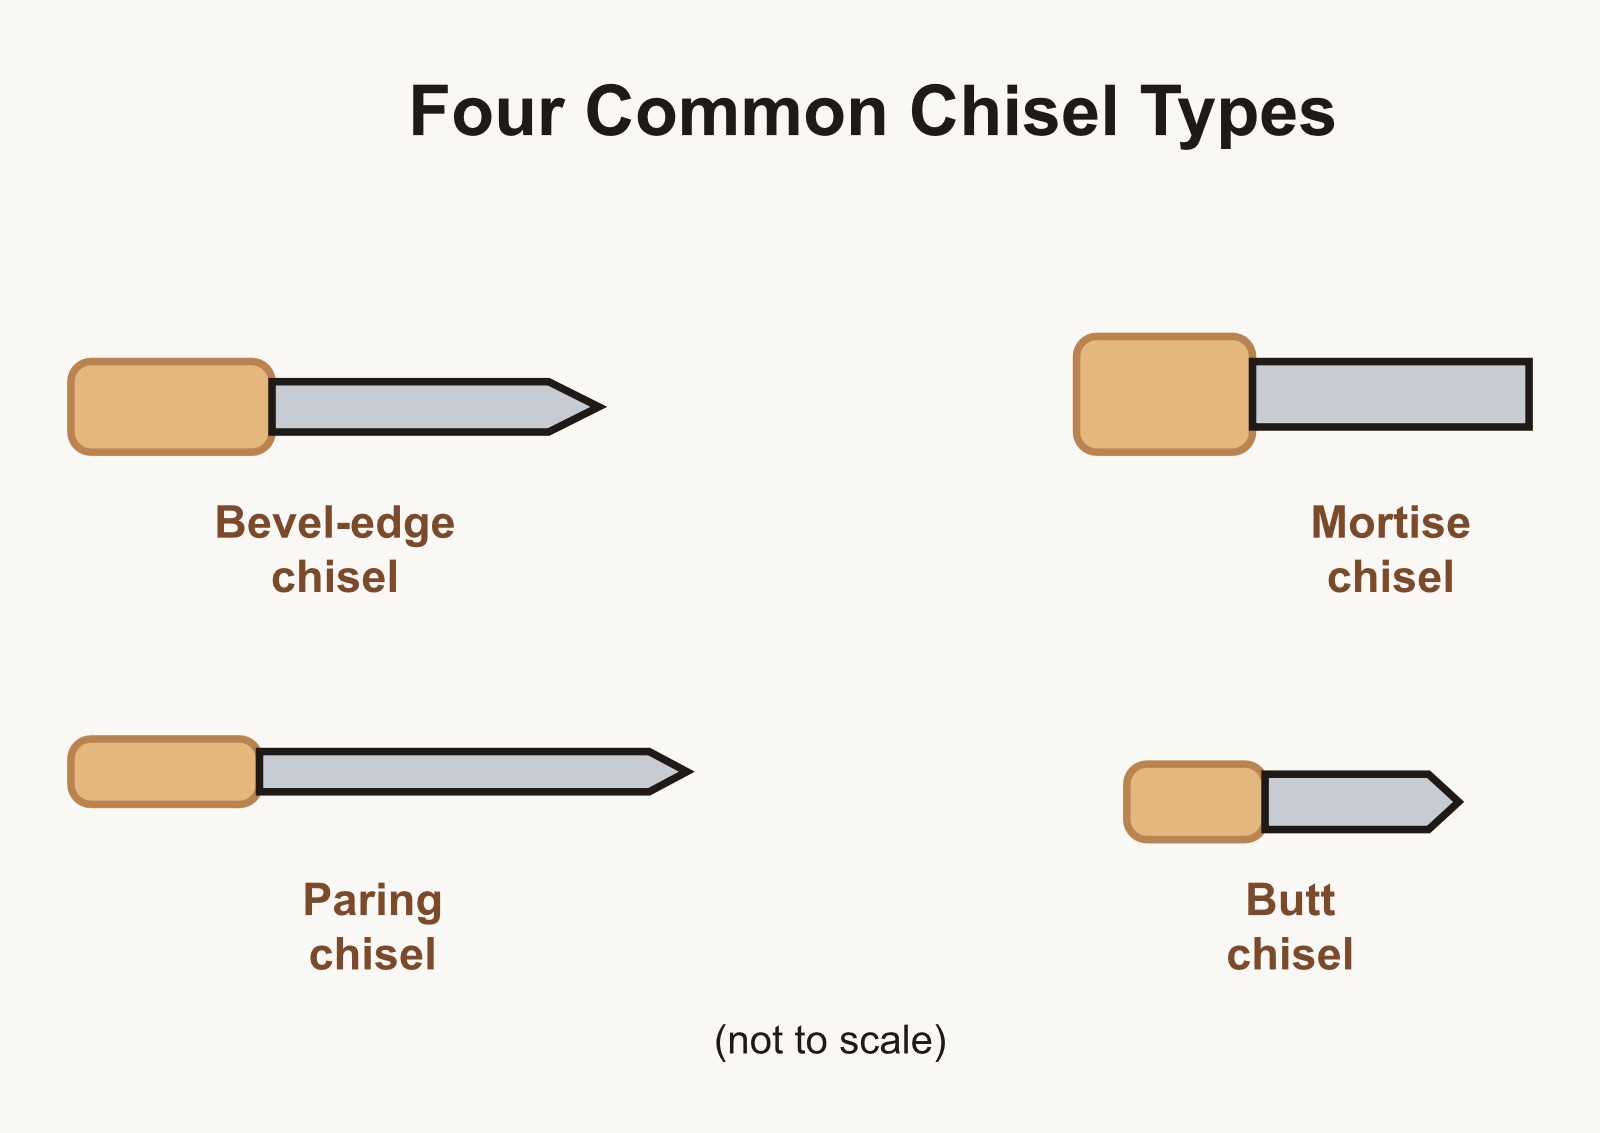
Blade shape tells you a lot about what each chisel is built to do.
| Type | Blade shape | Best for |
|---|---|---|
| Bevel-edge chisel | Flat back, beveled sides, medium length | The all-purpose shop chisel: trimming joints, cleaning corners, light paring |
| Mortise chisel | Thick, square-sided, narrow | Chopping deep, square mortises (slots) for joinery; built to take hard mallet blows |
| Paring chisel | Long, thin, lightweight | Slow, careful hand-pushed cuts for fine shaping — never struck with a mallet |
| Butt chisel | Short blade, short handle | Tight spaces, like mortising a door hinge in place |
| Framing (firmer) chisel | Thick, strong blade, flat sides | Heavy-duty work on larger joinery, rough shaping |
| Corner chisel | Blade meets in a 90° V shape | Cleaning square inside corners left by a router or drill |
A note on sizes
Chisels are measured by blade width, usually in fractions or millimeters: common widths run from about 1/8" up to 1 1/2" or more. A small set with 1/4", 1/2", 3/4" and 1" covers most beginner and intermediate projects.
Choosing the Right Chisel for the Job
- Match the width to the cut. For a 1/2"-wide mortise, reach for a 1/2" mortise chisel — it fits the slot and keeps the walls straight.
- Match the thickness to the force. If the chisel will be struck with a mallet, choose a sturdy mortise or firmer chisel, not a thin paring chisel, which can snap or bend under impact.
- Match the reach to the space. Tight corners, like a hinge mortise on a door edge, call for a short butt chisel.
- Match the finish to the task. For the final, smooth pass on a joint, a sharp bevel-edge or paring chisel pushed by hand gives the cleanest surface.
How to Use a Chisel: Basic Technique
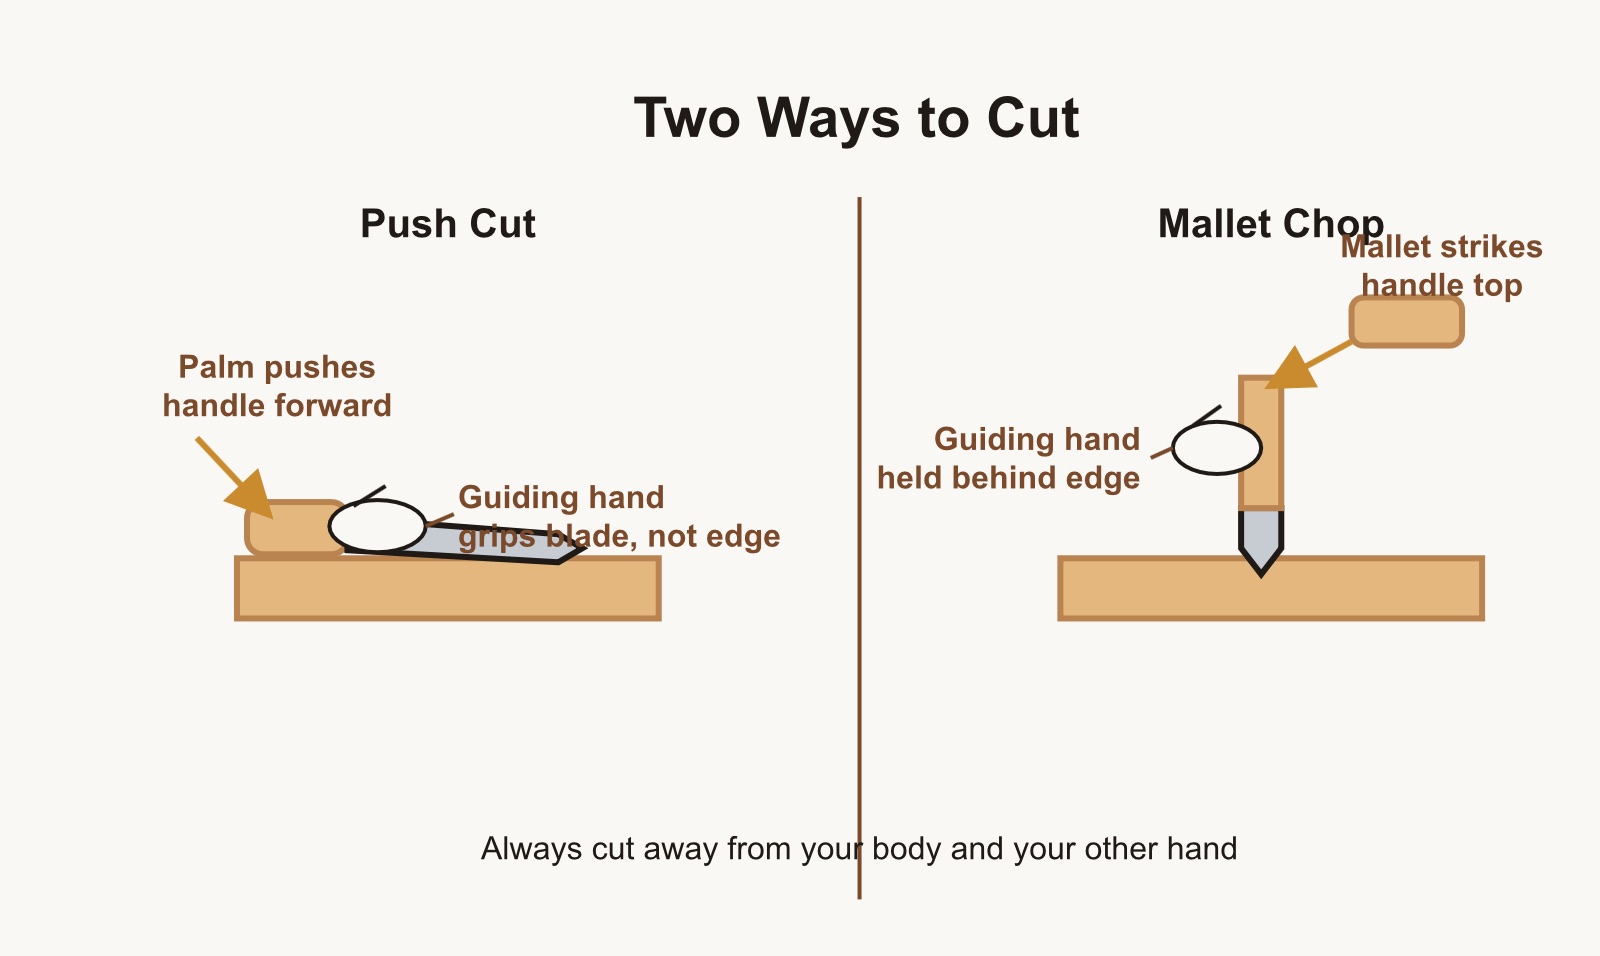
Push cuts for control, mallet chops for depth — both guided with hands behind the edge.
- Mark the line. Use a pencil and a square to mark exactly where the cut should stop. Measure twice.
- Clamp the work. Secure the board so both of your builder's hands are free to control the chisel.
- Choose push-cut or mallet-chop. For light, controlled shaving, hold the handle and push with the palm (a push cut). For deeper cuts, especially mortises, hold the chisel upright and tap the handle with a wooden or rubber mallet (a mallet chop).
- Guide, don't force. The guiding hand grips the blade (never the cutting edge) to steer it; the power hand pushes or taps. Let the sharp edge do the cutting — forcing a dull or misaligned chisel is how slips happen.
- Work in small bites. Take thin shavings or small chops rather than one huge cut. It's easier to control, and mistakes are smaller and easier to fix.
- Cut with the grain. Watch which way the wood grain runs and cut with it, not against it, for a cleaner, safer cut.
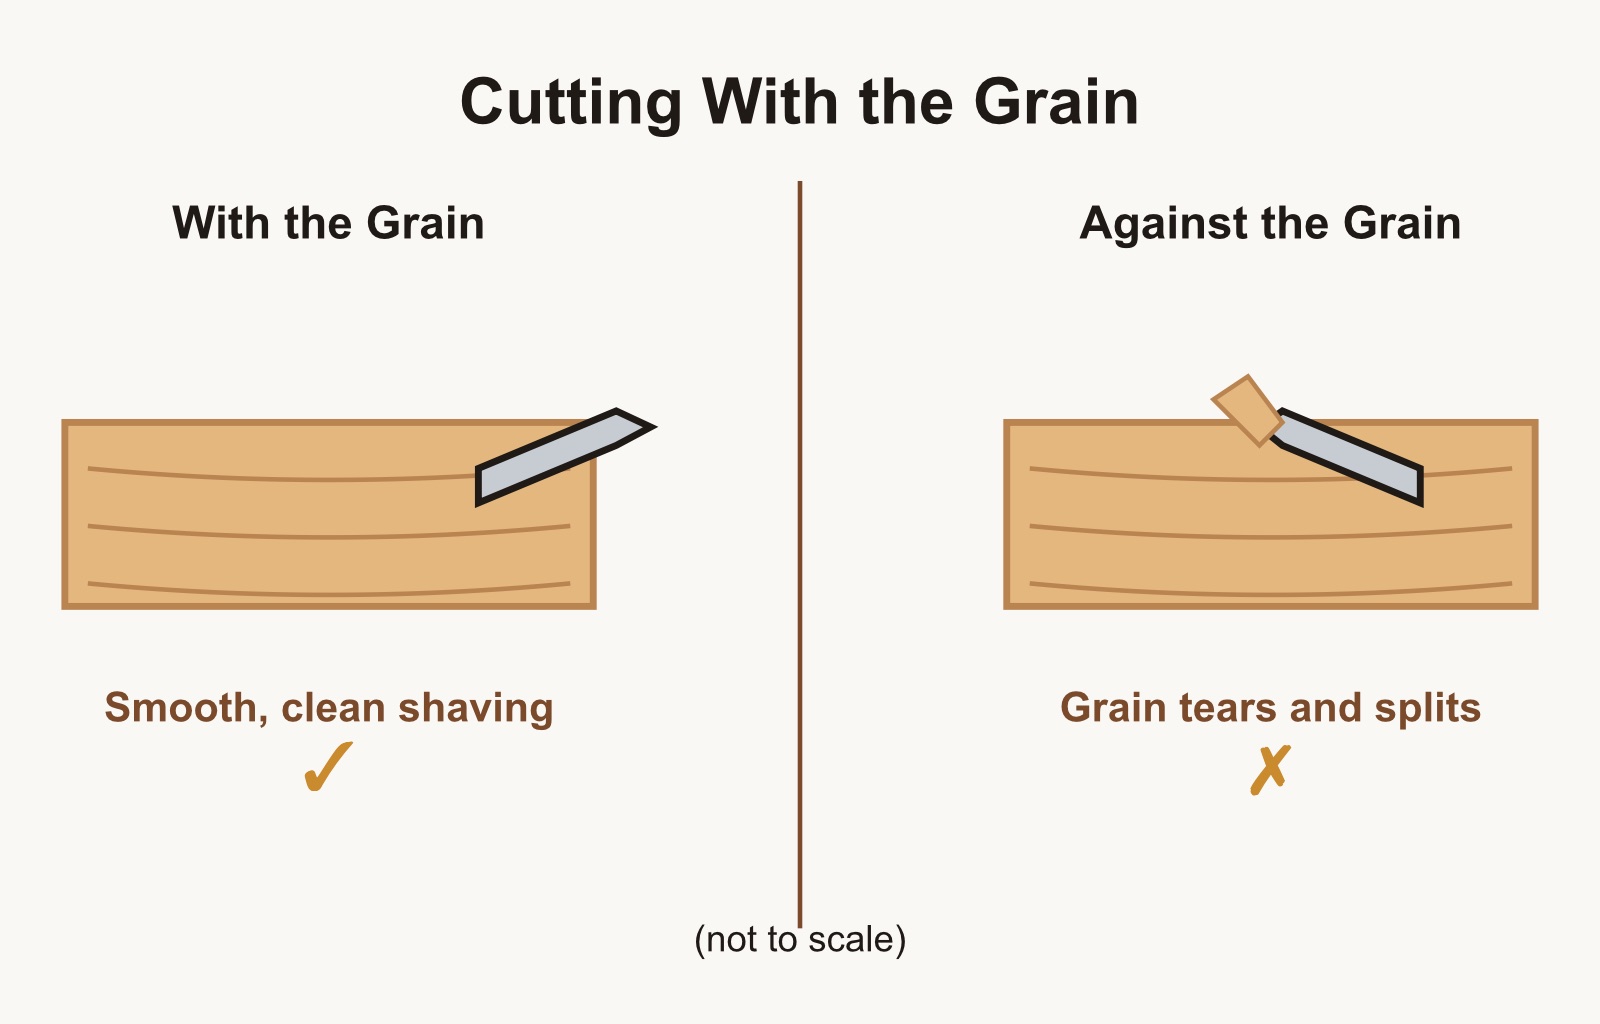
Watch the grain lines — cutting with them gives a cleaner cut every time.
Practice Activity: The Notch Challenge
This is a great hands-on exercise for a seminar, classroom, or home workbench.
What you'll need:
- A scrap piece of 1x4 pine
- A bevel-edge chisel (1/2" works well)
- A wooden or rubber mallet
- A pencil and a square
- Safety glasses
Steps:
- Mark a 1/2" x 1/2" square near one end of the scrap board.
- Clamp the board firmly.
- Score along the pencil lines with the chisel's cutting edge, tapping gently with the mallet to set a clean starting groove.
- Working from the edges toward the center, chop out small bits of wood with light mallet taps, keeping the chisel upright.
- Switch to a push cut for the final pass to flatten the bottom of the notch.
- Check the notch with the square — are the walls straight and the bottom flat?
This small notch uses every core skill: marking, clamping, chopping, and paring — the same moves used in real joinery like mortise-and-tenon joints.
Common Mistakes and How to Fix Them
| Mistake | Why it happens | Fix |
|---|---|---|
| Chisel slips sideways | Edge is dull or wood is uneven | Resharpen the edge; take smaller, slower cuts |
| Wood splinters or tears | Cutting against the grain | Flip the board or change cutting direction to follow the grain |
| Mortise walls are angled, not straight | Chisel wasn't held vertical | Check the chisel against a square before each chop |
| Handle splits over time | Mallet used on a paring chisel, or metal hammer used instead of a mallet | Use a wooden or rubber mallet, and reserve paring chisels for hand-pushed cuts only |
| Cuts come out rough | Dull edge or rushing the cut | Sharpen regularly; slow down and take thinner shavings |
Keeping Chisels Ready to Work
- Wipe blades dry after use to prevent rust.
- Store chisels with edge guards or in a rack — never loose in a drawer where edges can knock together.
- Check the edge before each project; a quick strop or light sharpening keeps a chisel safe and effective.
- Teach builders to hand a chisel to someone else handle-first, never blade-first.
Wrap-Up
Chisels reward patience more than power. A builder who takes slow, small cuts — and isn't afraid to flip the board, resharpen the edge, or start a notch over — is building real skill, one shaving at a time. Whether you're running a full seminar on chisel types or just introducing your first one at the kitchen table, the goal is the same: respect the tool, build the skill, learn from the wobbly cuts, and watch the confidence grow.
Bench Checklist
- Safety glasses on
- Chisel matched to the job (width, thickness, length)
- Workpiece clamped down
- Cutting line marked and checked with a square
- Cutting away from body and other hand
- Chisel stored edge-guarded when not in use
Reviews & build photos
No reviews yet. Built this one? Be the first to share how it went!
Write a review
Thank you! Your review of The Complete Guide to Chisel Types and Their Uses will appear after a quick check.
Found a mistake or have an idea for this guide?Tell us — we fix and improve plans based on your feedback.
Want to know when new designs and guides come out?
Join our mailing list for new plans, free guides and project ideas. For parents and teachers. No spam, unsubscribe anytime.